Taking a Credit or Debit Card Payment
These instructions describe how to apply a credit or debit card payment to an invoice through EPASS Pay, by adding a Payment line to the invoice, selecting an EPASS Pay Payment Type, and choosing a payment entry method.
Click here for more information about Entry Methods
There are three main ways to collect the customer's payment information for processing through EPASS Pay: through a PIN Pad, entering payment information directly into EPASS Pay (Form Keyed), or by using a customer's previous payment method that was saved to EPASS (Card on File). All three are referred to as Entry Methods.
PIN Pad EntryFor most in-store transactions,you’ll use the credit card terminal (PIN Pad) to capture payment from your customer. EPASS allows you to send a payment from any workstation to any PIN pad within the same store. This means that you can “share” the PIN pads between workstations by selecting the appropriate PIN pad when submitting payment.
Form Keyed Entry (Credit Card only)For card not present transactions (over the phone typically) there is a “form keyed” option which allows you to type the credit card number into a form on the invoice. These transactions could be pre-authorizations to ensure the customer has a good credit card, or they can be charges to the card.
Card on FileBuilt in PCI-DSS compliance with EPASS Pay allows you to save your customer’s cardssecurely within EPASS, so that they can be recalled for future or recurring purchases.
Before Starting
- Go to the Details of an Invoice that requires payment. Make sure that you are in Edit mode.
To Take a Credit or Debit Card Payment
-
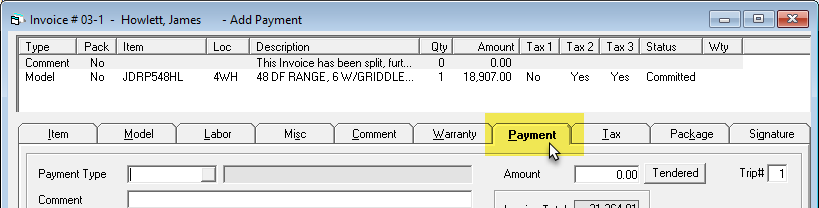
Click the Payment tab.
-
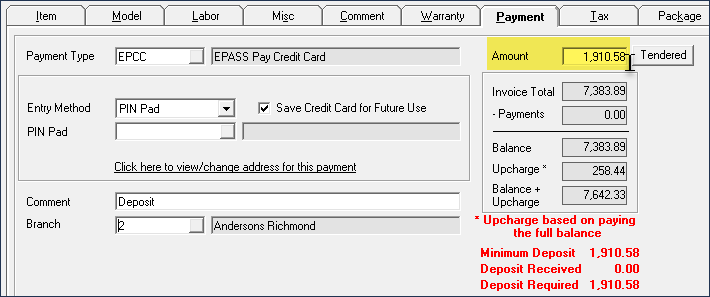
In the Payment Type dropdown, select EPASS Pay Credit Card or EPASS Pay Debit Card.

-
Enter the Amount of the payment.
-
In the Entry Method dropdown, select how you are entering payment info into EPASS:
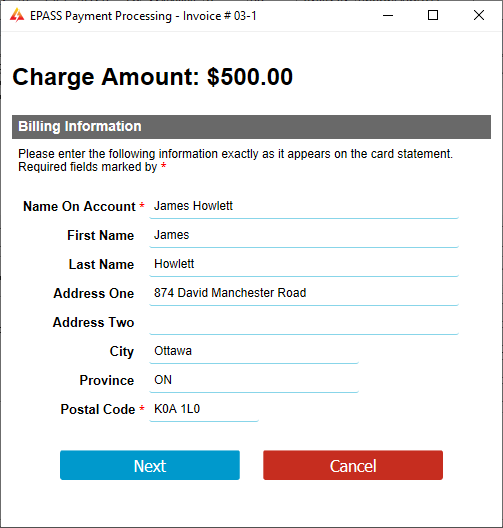
For non-cash customers (the EPASS Pay Cash Customer checkbox is cleared on the customer account record), all credit card and debit payments require the cardholder's:
- Full name
- City
- State/Province
- ZIP/postal code
This information must be present in the customer account record or entered during a form keyed payment.
PIN Pad
Follow these instructions if you are using a PIN Pad as the payment entry method.
-
Click the PIN Pad browse button and select the PIN Pad that you are using from the list.
 tip
tipClicking the Save Credit Card for Future Use checkbox securely stores the customer's card information so that you can use it again for a future transaction.
-
(Optional) Enter a Comment for this transaction. The comment appears on the invoice payment line.
-
If not already selected, select your Branch from the dropdown.

-
Click OK to begin processing the payment.
-
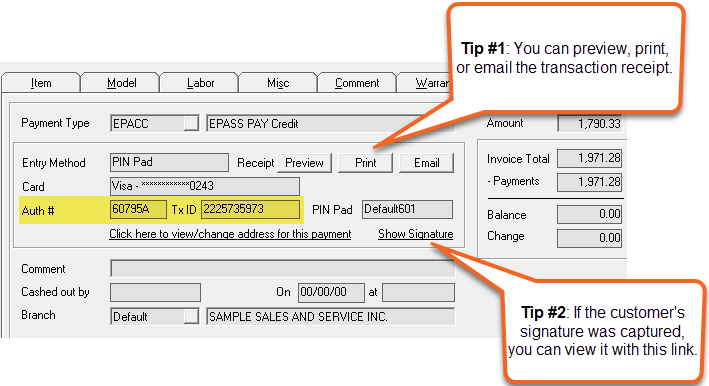
Complete the payment on the PIN Pad. Once the payment has finished processing, the result is applied to the invoice, and the authorization number and transaction ID is displayed on the Payment tab.
Form Keyed (Credit Card Only)
Follow these instructions for transactions where the credit card is not present (for example, over-the-phone transactions).
-
(Optional) Enter a Comment for this transaction. The comment appears on the invoice payment line.
-
If not already selected, select your Branch from the dropdown.
-
Click OK to begin processing the payment.
-
Enter the customer's billing information, and then click Next.
-
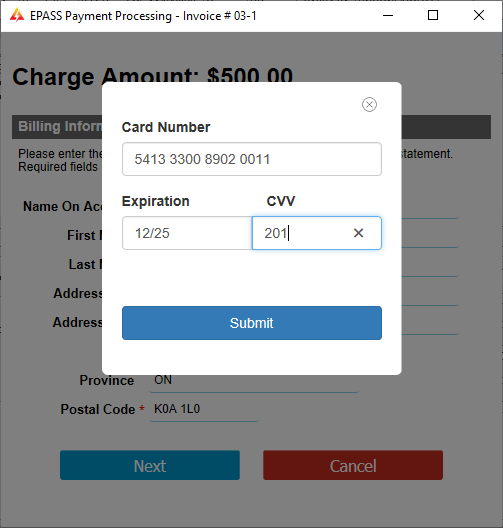
Enter the card number, expiration date, and CVV. Click Submit.
-
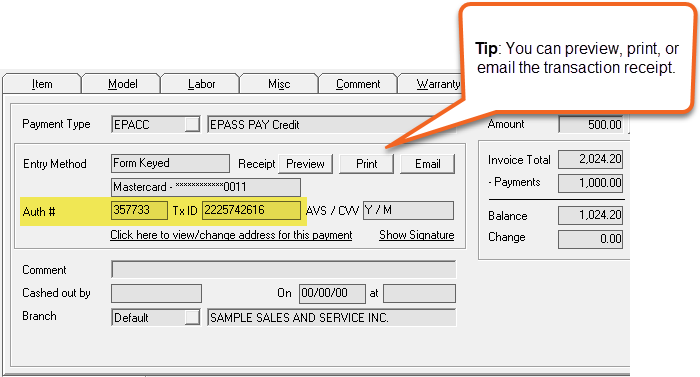
Once the payment has finished processing, the result is applied to the invoice, and the authorization number and transaction ID is displayed on the Payment tab.
Card on File (Credit Card Only)
Follow these instructions to use a payment method that was previously used by the customer and saved in EPASS.
-
Select the customer's Card from the dropdown.
 info
infoIf the Card dropdown is empty, then the customer's card was not saved during one of their previous transactions. If you want to save the customer's card info, make sure that the Save Credit Card for Future Use checkbox is selected when taking a credit card payment with the PIN Pad or Form Keyed entry method.
-
(Optional) Enter a Comment for this transaction. The comment appears on the invoice payment line.
-
If not already selected, select your Branch from the dropdown.
-
Click OK to process the payment.
-
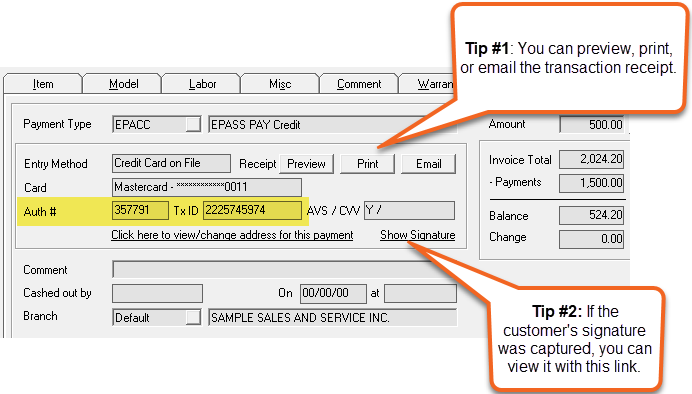
Once the payment has finished processing, the result is applied to the invoice, and the authorization number and transaction ID is displayed on the Payment tab.
See Also
- Taking an ACH Payment
- Refunding a Payment
- Voiding a Payment
- Searching for Transactions
- Viewing Reports
November 18, 2025